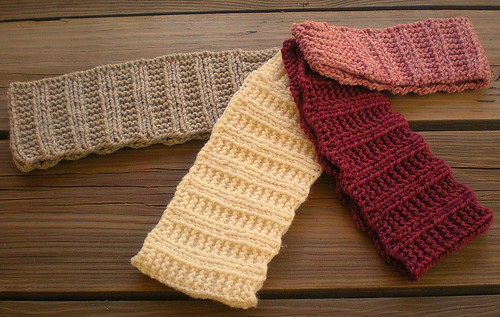
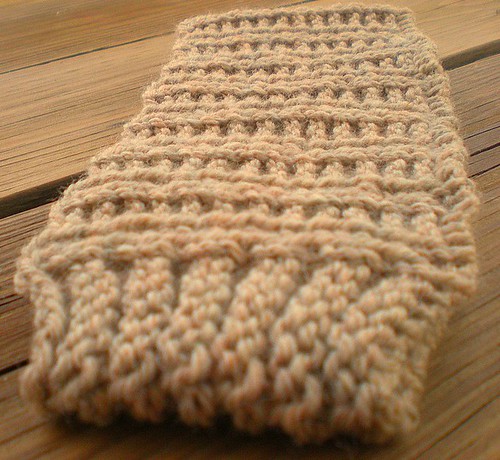
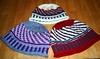
FROSTBEAT
Don't let icy ears keep you from enjoying the great outdoors when the temperature plummets. You can easily knit your Frostbeat in an evening. This is a truly unisex, reversible accessory. Offered in 4 sizes, it's great for kids and adults.
FROSTBEAT
Materials
Size
1stitch marker (if knitting in the round)
Tapestry needle
Patons Classic Wool Merino, much less than 1 skein (100 g/226 yd)
(or yarn and color of your choice in to give gauge below)
Gauge: 20 stitches and 26 rows equal 4 inches
Finished Sizes:
Child 2-8 yrs. (head circumference up to 18.5 in.)
Adult Small (head circumference up to 20 in.)
Adult Medium (head circumference up to 22 in.)
Adult Large (head circumference up to 24 in.)
NOTE: This is a reversible accessory. The inside is not identical to the outside (see photos), but both are fine to use as the "public" side.
CO 78 (90, 96, 102)
To knit in the round:
Place marker and join to knit in the round. The first 6 and last 6 stitches of each round form the narrower portion that is worn at the nape of the neck.
Round 1: K6, *(K1, P1, K1, P3) around to last 6 stitches; K6.
Round 2: K6, *(K1, P1, K4) around to last 6 stitches; K6
Round 3: P6, *(K1, P1, K1, P3) around to last 6 stitches; P6.
Round 4: P6, *(K1, P1, K4) around to last 6 stitches; P6
Round 5: K6, *(K1, P1, K1, P3) around to last 6 stitches; K6.
Round 6: K6, *(K1, P1, K4) around to last 6 stitches; K6
Round 7: P6, *(K1, P1, K1, P3) around to last 6 stitches; P6.
Round 8: P6, *(K1, P1, K4) around to last 6 stitches; P6
Round 9: K6, *(K1, P1, K1, P3) around to last 6 stitches; K6.
Round 10: K6, *(K1, P1, K4) around to last 6 stitches; K6
Round11: P6, *(K1, P1, K1, P3) around to last 6 stitches; P6.
Round 12: P6, *(K1, P1, K4) around to last 6 stitches; P6
Repeat rounds 1-12 until piece measures 2 1/2 to 3 inches, or desired depth, ending with any even-numbered round.
Bind off as follows: *
To knit Flat:
CO 78 (90, 96, 102)
The first 6 and last 6 stitches of each round form the narrower portion that is worn at the nape of the neck.
Row 1: (Right side) K6, *(K1, P1, K1, P3) across to last 6 stitches; K6.
Row 2: P6, *(P4, K1, P1) across to last 6 stitches; P6
Row 3: P6, *(K1, P1, K1, P3) across to last 6 stitches; P6.
Row 4: K6, *(P4, K1, P1) across to last 6 stitches; K6
Row 5: K6, *(K1, P1, K1, P3) across to last 6 stitches; K6.
Row 6: P6, *(P4, K1, P1) across to last 6 stitches; P6
Row 7: P6, *(K1, P1, K1, P3) across to last 6 stitches; P6.
Row 8: K6, *(P4, K1, P1) across to last 6 stitches; K6
Row 9: K6, *(K1, P1, K1, P3) across to last 6 stitches; K6.
Row 10: P6, *(P4, K1, P1) across to last 6 stitches; P6
Row 11: P6, *(K1, P1, K1, P3) across to last 6 stitches; P6.
Row 12: K6, *(P4, K1, P1) across to last 6 stitches; K6
Repeat rows 1-12 until piece measures 2 1/2 to 3 inches, or desired depth, ending with any even-numbered row.
Bind off as follows: *
Copyright © 2009
The Caffeinated Knitter
http://thecaffeineatedknitter.blogspot.com
All rights reserved. This pattern is protected by copyright. No part of this pattern may be reproduced in any form or by any means including but not limited to photocopying, email file attachment or posting on the internet. Completed projects may not be offered for sale. If you find an errors in this pattern, or have any questions about it, please feel free to contact me via Ravelry or my contact link on the top right of this page.


20 comments:
Thank you for posting this pattern. I love it. Great for my kids that live in Virginia and minnasota. I would love to get your updates or blog emails. ginnylynnfloyd@yahoo.com if thats possible. I am a new knitter and need all the help I can get. Happy Holidays. Ginny
This is an XLNT pattern!!! There are some folks that I wanted to knit a hat for but this is so much better and I will actually get them done. Thanks, Caffeinated Knitter.
Aine
Thank you so much for this wonderful pattern - it was fun and quick to make! It's so hard for my dad to find hats large enough for his head - your instructions allowed me to make this fit perfectly - he loves it, and so does my little girl - now she wants one, too! :)
I'm also starting your Toasty Twisty scarf, which looks like lots of fun, too.
I'm so happy you like it! :)) Thanks for kudos!
i don't understand the bind off. everything else was PERFECT! Sorry!
Well, the important thing is that the bind-off is stretchy and doesn't look a lot different than the cast-on. This bind-off works well for that. Another option would be a sewn bind-off, but you can use whatever method you prefer.
This looks fantastic, thank you so much!
I've just come in from an hours walk with terrible earache! This earwarmer looks like the perfect solution and I'll be able to knit one up ready for my next outing!! Going to have a look at the rest of your site now! Many thanks
Jane
I am so excited to use your pattern. I make scarves and hats for my granddaughter every year. It's become a tradition for me. My granddaughter lives in Juneau, Alaska and can really use them. Thanks again.
Thank you! I just want to say how much I LOVE this pattern. So much so that it has inspired me to modify it to make a coffee cozy. I will be posting it on Ravelry on my projects page and giving you credit for the rib design. You just CO 42 stitches, omit your first and last 6 stitches, do 12 rounds, and finish with 5 rounds of K1,P1 ribbing. "Knitgiver"
I am new to knitting and am wondering how much of a difference it would make if I used size 8 needles for this project. Will I need to make any adjustments? Thank you!
Was kind of frustrated with the bind off. Even though I BO with the k2tog it wasn't loose enough. I end up having to completely redo it. Is there another bo that is stretchier than the k2tog?
Love this pattern! I was looking for something quick and easy to make, and I found it! I added my own personal twist to it, and added a crochet flower to the side one that I made for a friend. Very cute!
First I want to say thank you for this pattern. I was looking for something easy and quick to make for a Christmas present for my sister.
Second, can you please explain the bind off process in detail. I'm making an adult medium that starts with 96 stitches. Am I supposed to just knit 2 stitches together or am I supposed to also do the bind off process where you pull one stitch over the other and then let it go?
Can you tell me how many stitches I'm supposed to end up with in each row and at the end.
Thank you
omg! love it! i made a headband just like it! - but it didn't turn out looking the same. thaks for the inspiration!
-12 year old crafter
I need help with the bind off also! It didn't work out and ended up looking like a round doyle. Is there a better method? Everything else was great!
Hi, I'm very new to knitting, and I would like to make a few of these for Christmas gifts. I'm so new, and I have only used the knit stitch in anything I've attempted to make. I'm making this project my first one to be completed. Anyway. I'm confused by the Cast on. How many stitches do you start out with, and work from there?
These patterns look great. I'm a fan of DIY ideas like this. Thanks for making my day.
Fred สล็อต
I don't understand the bind off at all. It made one edge very tight, so I tried undoing it and using a normal bind off, and still didn't work out
I understand the confusion about the bindoff. It is a pretty simple bindoff, makes it very stretchy- nice when you want to slip the ear warmer on and off easily.
Maybe this will help. If not, youtube is how I learned it, just searched for "stretchy bind off." a short video is worth a thousand words!
Knit 2 together (K2tog), which will yield one stitch processed on your right needle.
Slip that K2tog stitch back onto your left needle.
now do a K2tog using the K2tog and the next stitch on your left needle to do the new K2tog.
You wind up knitting stitches twice, using more yarn, which yields a edge that is much stretchier.
Best of luck all!
If you are going for best contents like me, only pay a quick visit this web page สล็อตเครดิตฟรี all the time because it provides feature contents, thanks
Post a Comment